Topic: Detailed instructions for installing the OpenVPN client on Windows OS
First of all, download and run the OpenVPN client installation package. Pay attention to the version and the bitness of the operating system.
1. 
Click "Next"
2. 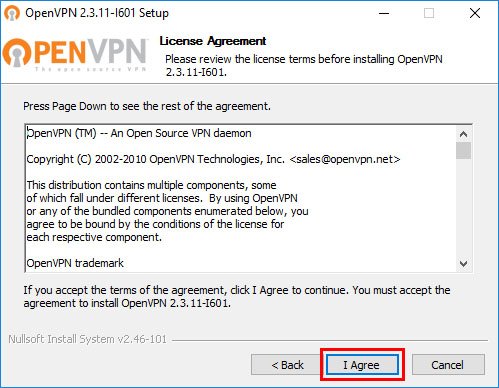
We agree with the license by clicking "I Agree"
3. 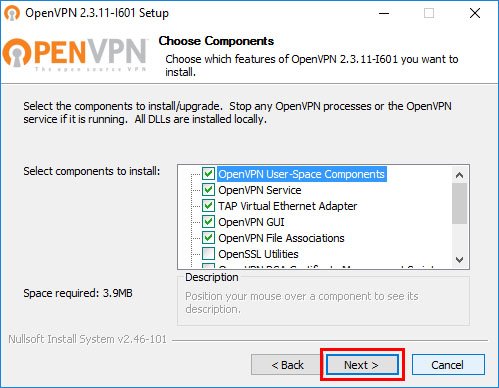
Click "Next", leave everything by default
4. 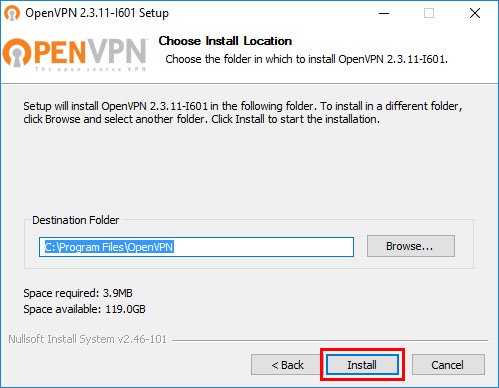
Choose the path for the installation (or leave it by default) and click "Install"
5. 
During installation, you may also be prompted to install the TAP driver. Agree, by clicking "Install"
6. 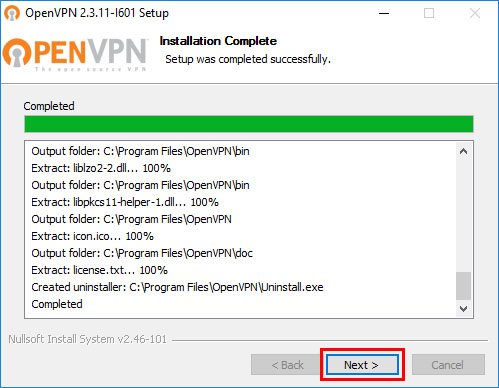
Click "Next"
7. 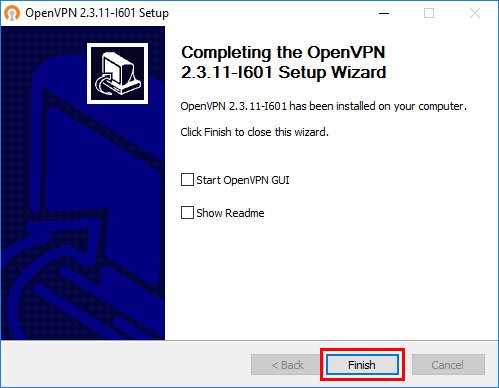
Remove all the checkmarks and click "Finish"
8. 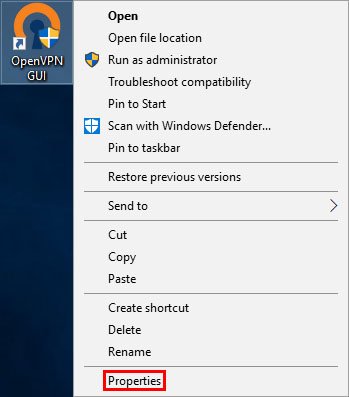
After the installation is completed, the program icon will appear on the desktop. Click on it with the right mouse button, then select "Properties"
9. 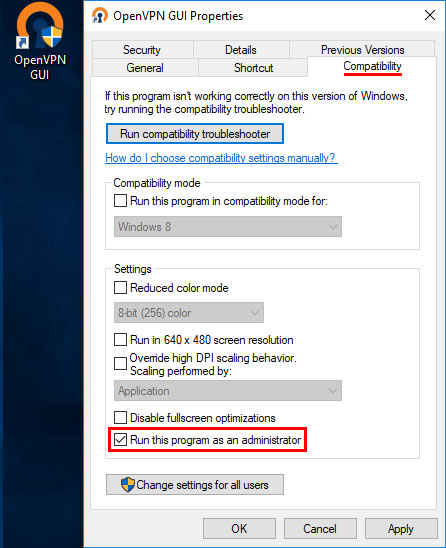
Select the "Compatibility" tab, tick the "Run this program as administrator" and click "OK"
10. 
Download the configuration files of the server you need from the site https://www.freeopenvpn.org/en/, and copy them to the "config" folder of the installed OpenVPN program. If you left the default path, as suggested, it will look like this: C:\Program Files\OpenVPN\config or C:\Program Files (x86)\OpenVPN\config
11. 
Run the OpenVPN GUI program from the desktop, after which the icon should appear in the tray as a gray monitor with a lock
12. 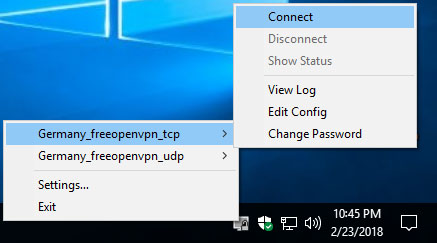
Press the right mouse button on the icon. Select the necessary server from the list of the configuration files which you copied into "config" folder and click "Connect"
13. 
During connection the monitor icon in the tray should change from yellow to green (when successfully connected)